This post today is a blog-specific topic, so if you’re not a blogger this likely won’t make a lot of sense to you and probably won’t have any relevance. Regular posting will resume tomorrow, but I was so excited when I figured out how to correct blown-out windows using PicMonkey, and I really wanted to share with all you bloggers who might be in the same boat.
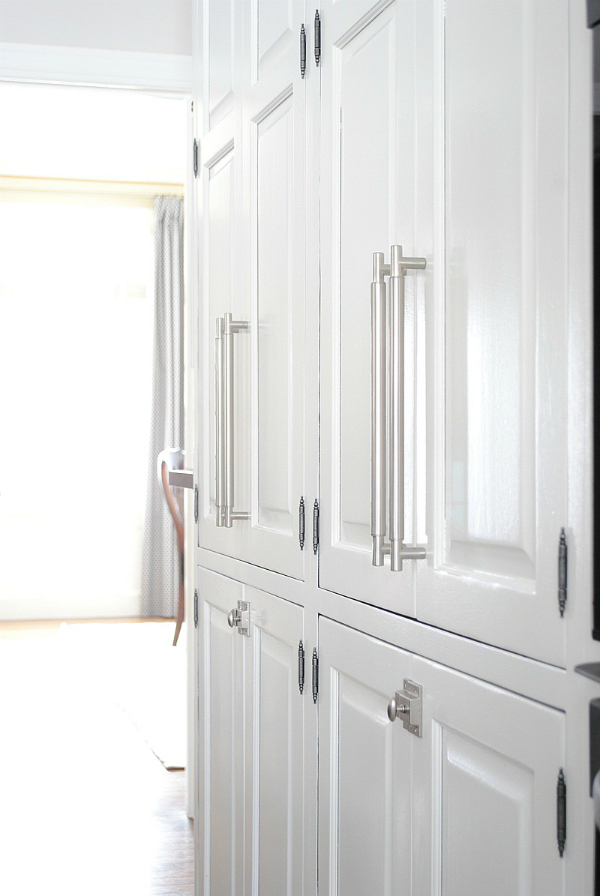
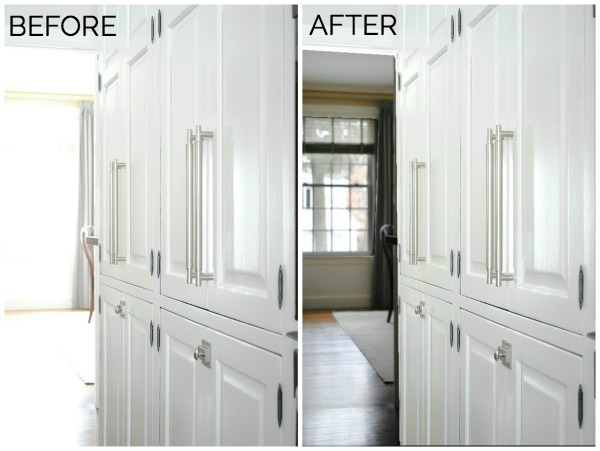
Blown out windows happen when you’re photographing a room and have set the exposure on your camera to make the room look bright and clear. When there’s a window, however, you get this area of white where you lose all detail. Like in the background of this photo from last week’s post about painting kitchen cabinets.
Professional photographers can use special lighting and equipment to remedy this, and there are also ways to correct it in Photoshop. I do not, however, have this special equipment nor do I have Photoshop so until very recently I thought this was just something that I couldn’t correct myself. Until I tinkered a bit with PicMonkey, which is a free photo editing site, and figured out that you can layer the photos to correct these lighting issues.
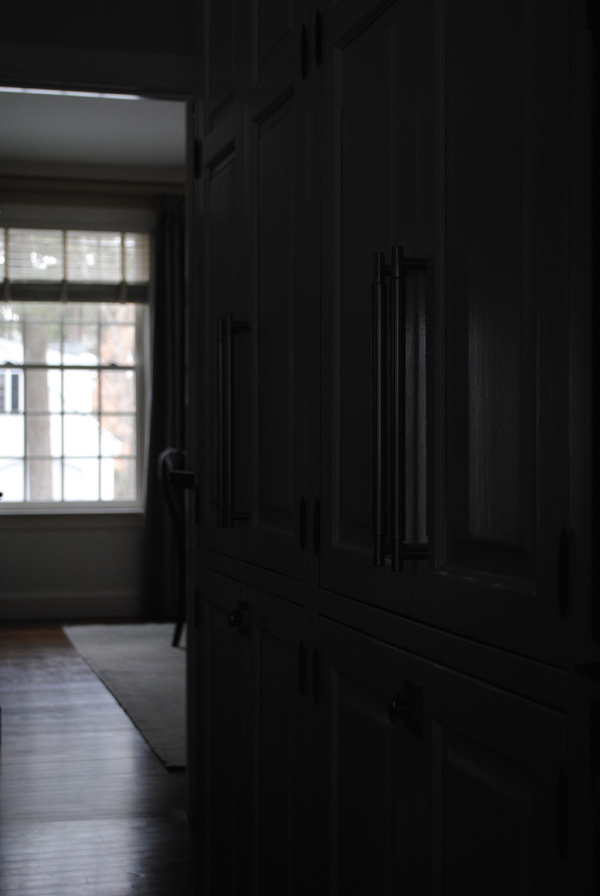
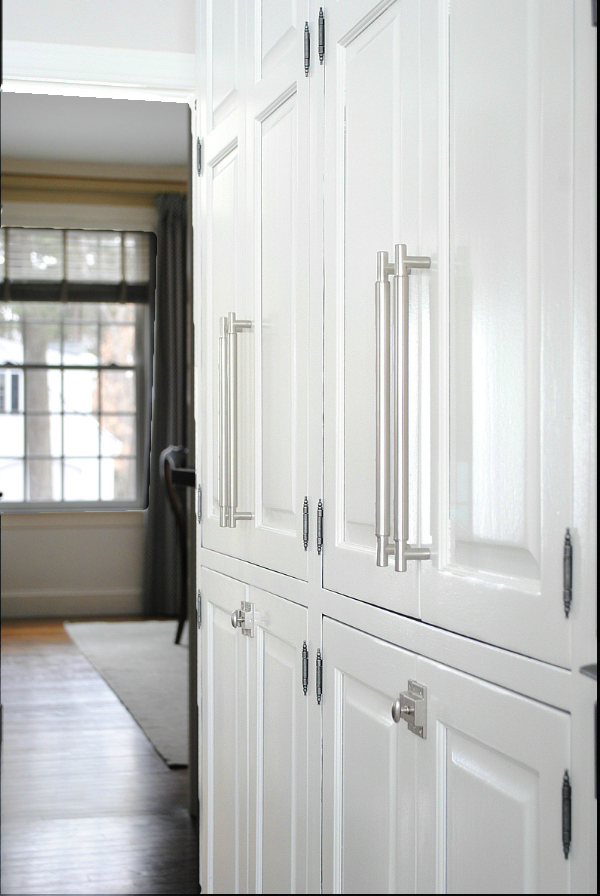
First, you need to take a couple photos, using a tripod, so the images are oriented exactly the same. You need to have one photo exposed so the room looks as you want it to (the windows will look blown out) and another photo so the window looks defined (the room itself will look dark). This is what my photo taken for the window looked like.
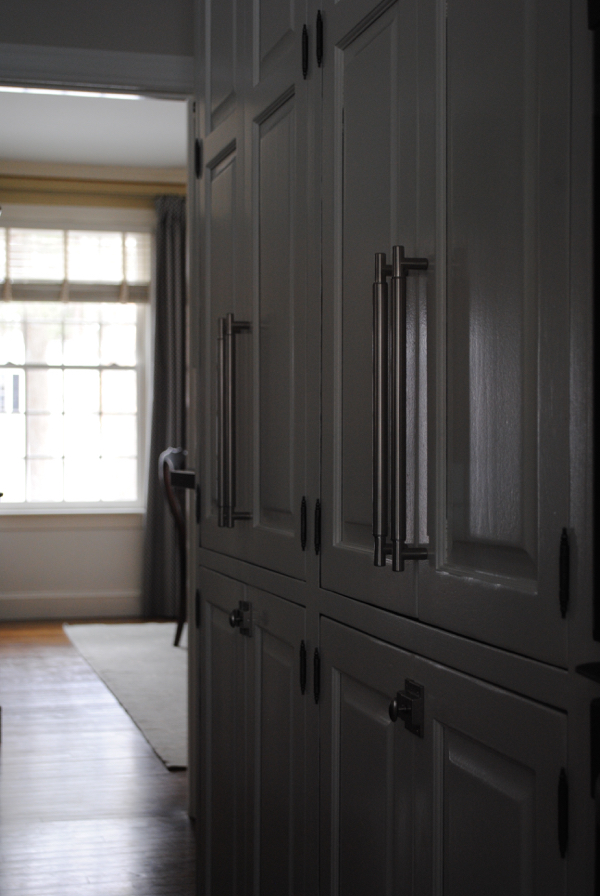
I also took a third picture exposed for the dining room in the background, which was somewhere in the middle between the other two.
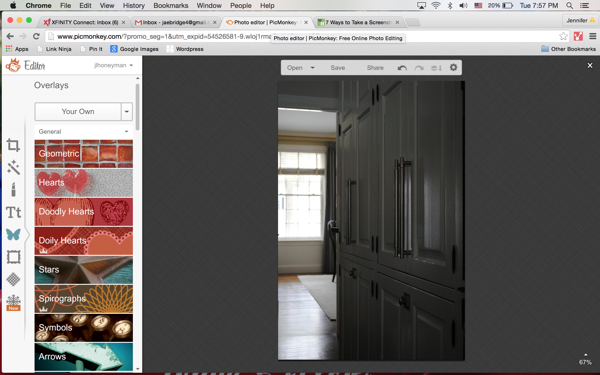
I started by opening that middle-exposed photo in PicMonkey.
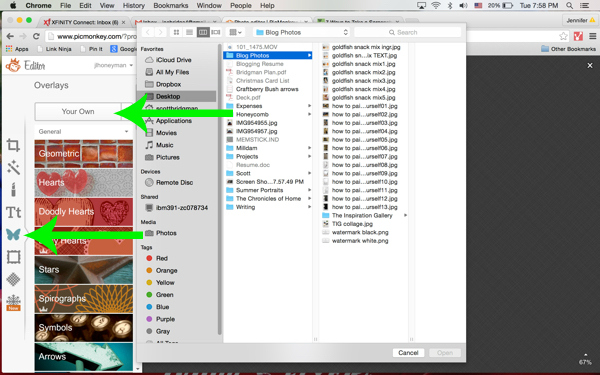
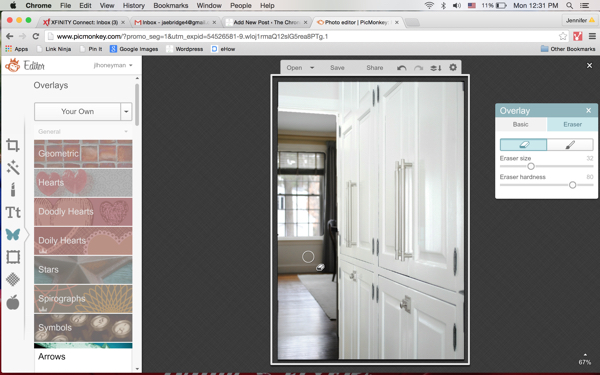
Then I clicked the butterfly icon to open the Overlay option, and then “Your Own.” This opened my desktop files and I chose the brightest photo I’d taken.
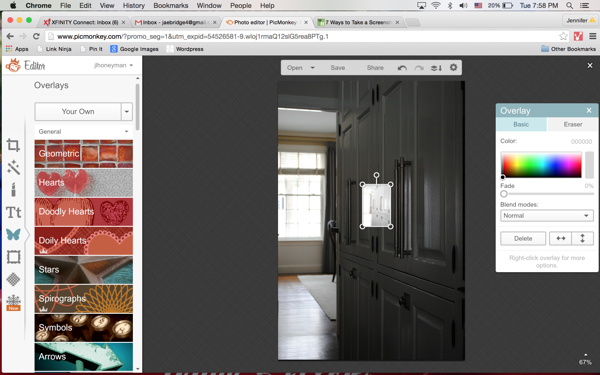
The photo will open as a tiny little image.
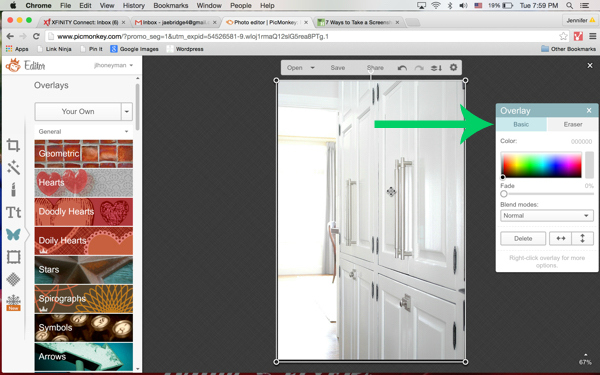
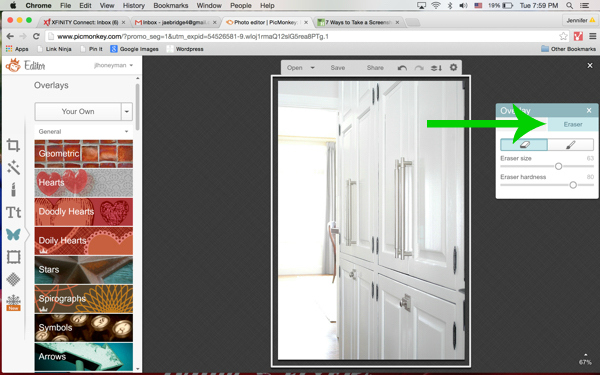
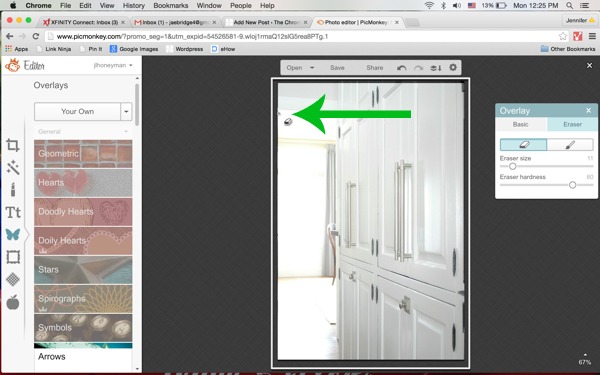
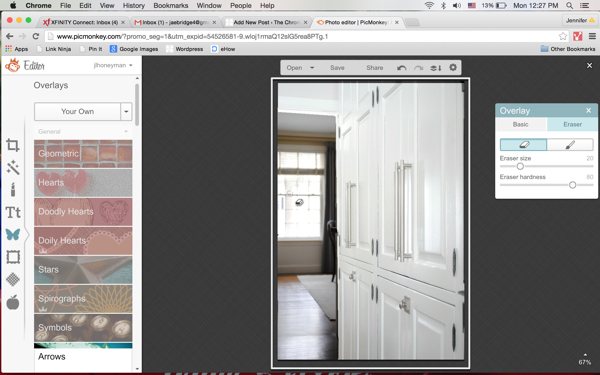
Stretch the edges of the photo so it completely covers the darker photo. Get the edges to line up as exactly as you can to ensure that the images in the two photos are exactly on top of each other. The Overlays box has two functions, Basic and Eraser. It automatically opens in Basic.
You will need to click Eraser. This is going to “erase” sections of the top, brighter photo to reveal the darker photo underneath.
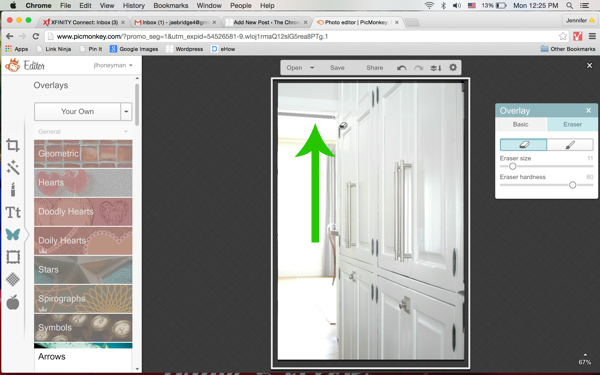
For a section like I’m working with, which was pretty rectangular, I adjusted the size of the eraser to be on the small side and then clicked a corner of the space I wanted to erase.
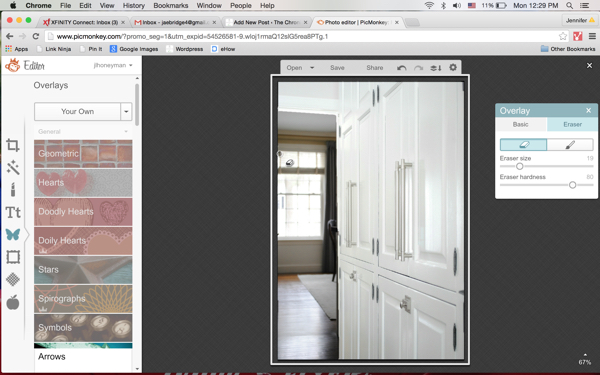
Then I held down the Shift button and clicked an adjacent corner, which erased a straight line from the first click to the second.
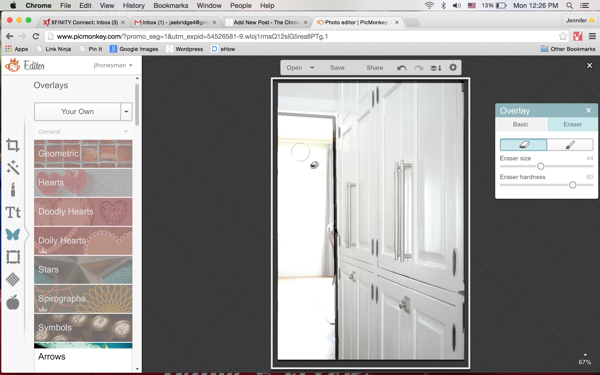
I did the same for another adjacent corner to erase a straight line from top to bottom.
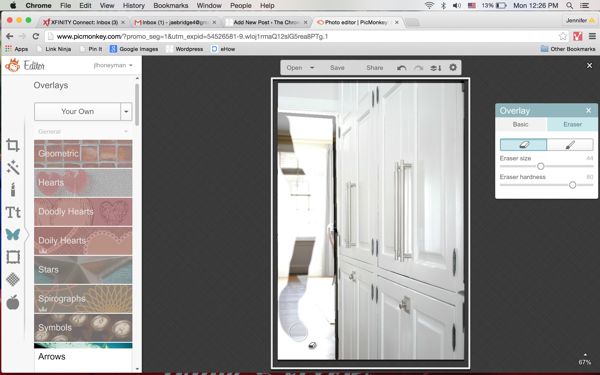
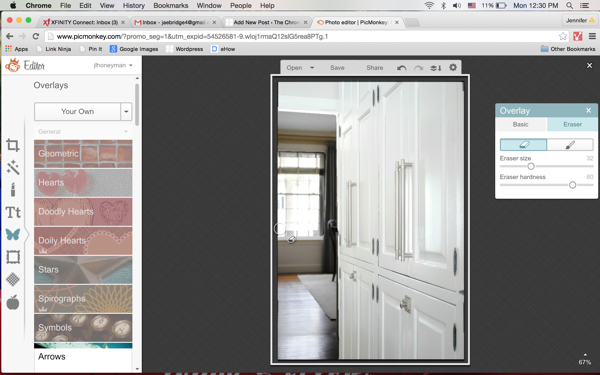
Then I made my eraser larger and freehand erased the area between the guidelines I’d made.
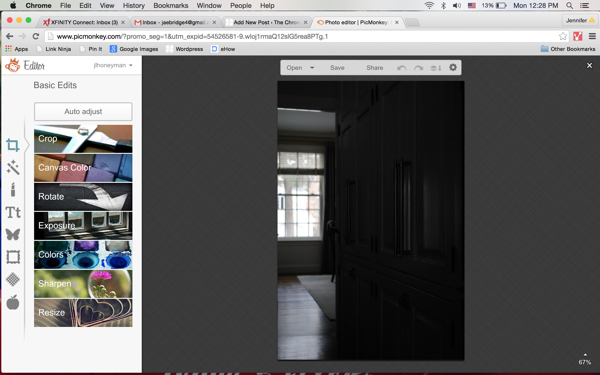
When I was finished I saved the image. I wanted to take things one step further and really bring out more definition in the window, so I opened the darkest of my images in PicMonkey.
I repeated the same process as above, opening the newly saved image as an overlay, stretching it to fit over the dark image, and choosing the Eraser function in Overlays.
I used the same corner click, then Shift button, then adjacent corner click as above, focusing only on the area inside the window frame.
Now the window has nice definition to it and the picture looks more like what you would actually see in person if you were standing in my kitchen and taking in this view.
If you look closely, you can see the edges where the top image was erased, but when someone is looking at a photo they aren’t dissecting it that way and just see the picture as a whole.
I’m so glad to have this little trick in my arsenal, and of course the best part is that it’s done in a free editing program!

Well look at that. Awesome and good to know!
Thanks! But you’re a Photoshop guru, right?! I just can’t seem to bite the bullet on it! It totally scares me.
It’s not scary at all and I love it but am certainly not a guru. I’m rusty ;)
Thank you so much! I cannot wait to try this!
It was such a revelation for me when I figured it out!
Great tip! I never think to use pic monkey for things like that!
I’ve only recently started using it as my primary editing program – I think it’s so much better than iPhoto, which is what I was using before.
Thanks, Jennifer. I have a couple of spots that I’m going to have to do this…
I have so many photos I want to go back and reshoot now! If only there were more hours in the day… Thanks, Emily!
You are a GENIUS! I also thought I had no hope for blown out windows b/c I don’t use photoshop. Love picmonkey, that’s all I use, and I can’t wait to try this! Thanks Jen!
Thanks, Jennifer! I was SO excited when I figured this out!!
I’ve always wondered how to do this! I hate that the exterior shots are lost with blown out light. Great tutorial!
Thanks, Sarah – me too, I felt like that blown out look made my photos look more amateur. And I’m still pretty much an amateur but every little trick helps ;)
nice article, thanks for your tutorial. its helpful. we’ll make my picture to better. we have some beautiful collection, please visit my site to http://www.indo-furni.com
regards
This is INCREDIBLE!! Although I use Picmonkey, I feel slightly intimidated, but am going to give it a shot! This seems very high-tech, so hopefully it comes out like your image! Thank you SOO much for sharing!
Oh my gosh – believe me, if I can do this so can you!
WHAT! Mind blown! You are a genius for figuring this out! I love it!
It kind of blew my mind when I figured it out too!
Love this Jennifer – thanks so much for the awesome tutorial! I love Picmonkey and keep finding out more and more cool things you can do on it – happy to add this feature to the list!
It really has so much more to it than I ever realized!
You are just a little genius!! Thank you!
Haha! Well thanks :)
YES!! Needed this, Jennifer. I am a PicMonkey fan (even though I’ve used Photoshop and Lightroom, they are just so much more complicated.) I have WAY to many blown out windows in pics. Yikes…
Goodness, me too. At least this will help me correct some of them :)
Thank you so much for this tip!
You’re welcome! I’m excited to test it out even more.
So youre pretty AND a genius…#winning. This is so cool Jen. I wouldve NEVER thought to do this. Honestly ive used PicMonkey since the beginning of my blogging days and had no idea you could even do this. Thanks so much for sharing
I mean, I JUST figured it out. I think PicMonkey has lots of hidden genius gems we don’t know about!
What a great trick Jen! Thanks for posting!
Thanks, Leslie!
Aren’t you so super clever!!! Great tip!!!
Ha, thanks, Cassie!
Well, this is totally awesome! I’ve used the eraser function before, but never to ‘meld’ 2 photos together! Thanks for sharing!!