Here’s a list of products I highly recommend for staining and sealing butcher block. If you are starting with fresh butcher block, not a slab that is being refinished, you won’t need the coarse grit sandpaper listed here.
- Pad sander
- Coarse and fine grit sandpaper
- Dust extractor (an investment but HIGHLY recommended for any home improvement project that requires sanding – it basically eliminates all dust in the air so there is almost no cleanup!)
- Wood conditioner
- Fine grit sanding sponges
- Microfiber cleaning cloths
- Wood stain
- Foam brushes
- Rag (I usually use an old t-shirt)
- Waterlox Original Sealer
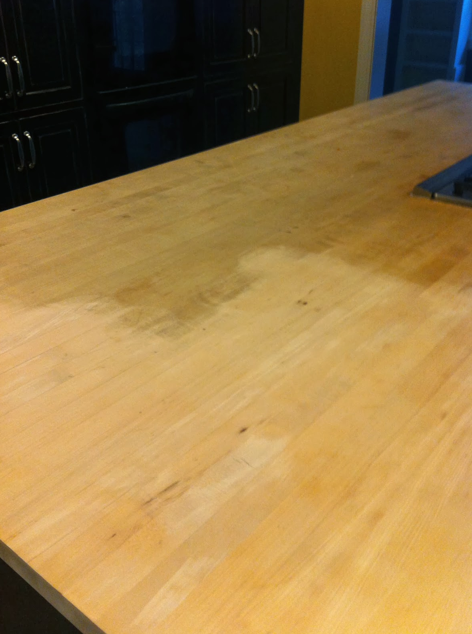
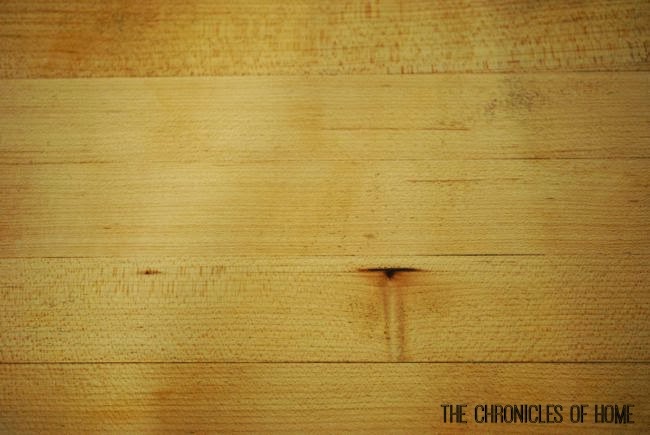
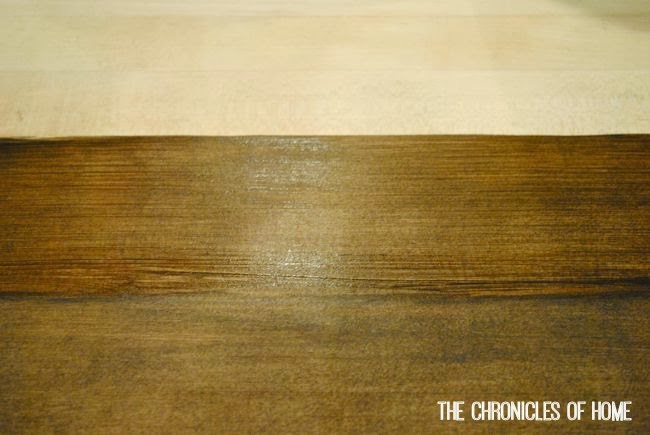
And now for how to stain and seal butcher block counters…or rather, how not to… The very first thing I did was sand the butcher block down to bare wood using a pad sander, coarse grit sandpaper, and a dust extractor. I didn’t even realize how darkened and stained the wood was until I started getting down to the bare wood and saw the difference.
Isn’t that crazy??
After I finished sanding with coarse grit sandpaper I went over everything with fine grit to get it nice and smooth.
Here’s where we talk about what NOT to do when staining butcher block counters.
- Do NOT skip wood conditioner. I didn’t think I needed it because the wood wasn’t soft but the stain soaked in so unevenly and looked pretty awful. So I applied another coat of stain on top, thinking it would even things out.
- Do NOT do this either. It just accentuated the blotchy spots and left me with that much more to remove later.
At this point I knew I was going to have to sand the counters back down to bare wood again, which had me feeling slightly devastated. But using a dust extractor has been an absolute game changer for me because there is no mess after sanding, so I accepted my defeat and went back to square one.
So here I was, back down to bare wood, ready to have a go at round two. So…now for how to stain and seal butcher block counters…you know, the right way.
buywithoutprescriptionrxonline.com/strattera.html
rxbuywithoutprescriptiononline.net/zovirax.html
- STEP ONE – apply a wood conditioner appropriate to the stain you’re using. If you’re using an oil-based stain, use a wood conditioner meant for oil-based stains. If you’re using a water-based stain, use a wood conditioner meant for water-based stains. I was using a water-based stain so used this wood conditioner. The counters won’t look much different at this point, just perhaps a little more intensely grained.
- STEP TWO – give the entire surface a good sanding with fine grit sandpaper. That’s right – sand again after the wood conditioner has dried. The wood conditioner will cause the grain to raise in spots and sanding makes it nice and smooth and ready for stain. You should do this by hand, and not with a power sander. Wipe the surface down with a microfiber cloth to remove any dust.
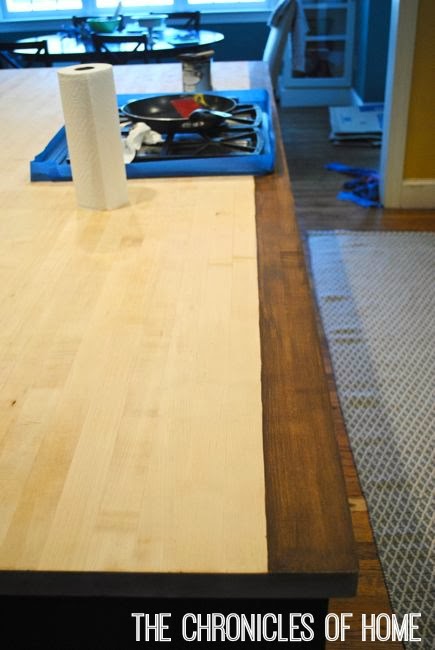
- STEP THREE – apply your stain. I used Daly’s water-based stain in walnut. I applied the stain using a foam brush, and moved quickly to cover two side-by-side boards the entire length of the counter. Then I wiped the excess stain away with an old t-shirt.
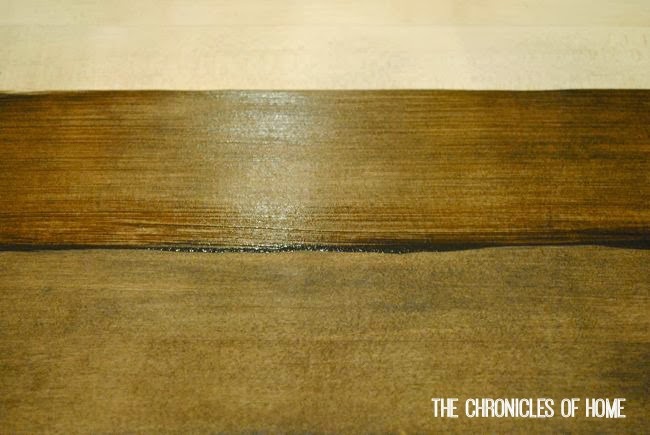
- As you overlap rows of butcher block, pay close attention to the stain buildup you get when you go over some of the last stained row with stain for the next row.
- To avoid those stripes from sinking in, you’ll need to wipe them away with a rag almost immediately.
- When the entire counter is finished, it might look a little dull and streaky – don’t despair! Once you add the sealer coats, the shine softens everything.
- STEP FOUR – after letting your stain dry overnight, apply a coat of Waterlox Original Sealer. I found it best to apply this with another old t-shirt remnant. If you have a kitchen vent or hood, turn it on before you start – this stuff is STINKY. If you live in a warm enough climate, open the windows! Let it dry for 24 hours.
- STEP FIVE – sand the entire surface by hand with fine grit sandpaper to remove any little bubbles. Wipe with a microfiber cloth. Repeat the Waterlox application. Let it dry 24 hours.
- STEP SIX – repeat the sanding, wiping, and Waterlox process one more time.
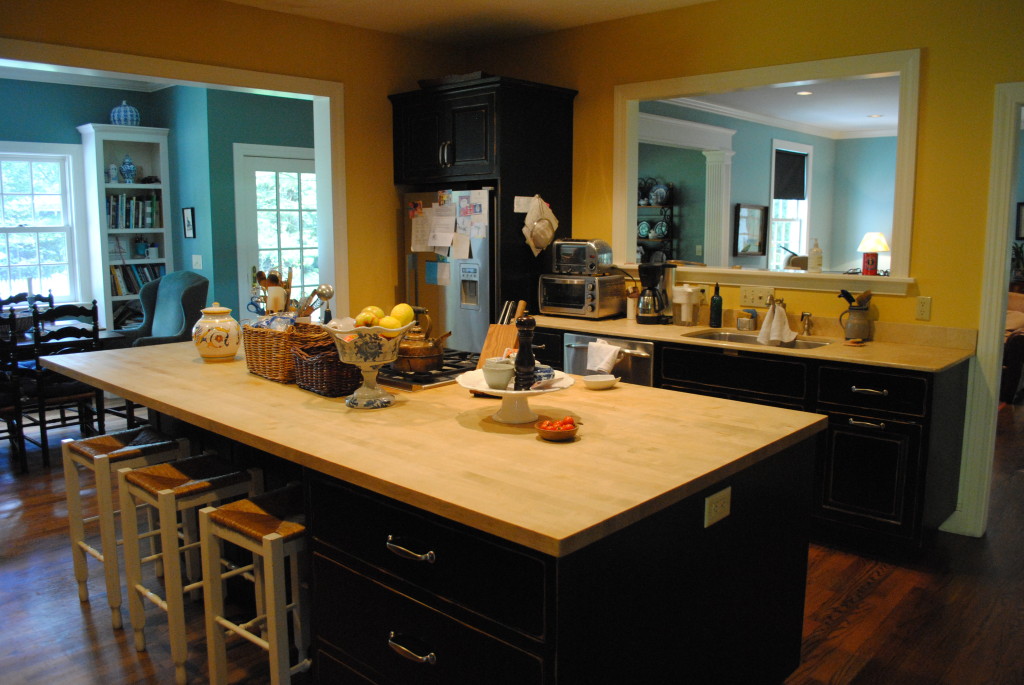
The process is a bit drawn out but the results are so worth it. The counters are sealed thoroughly now and look just beautiful. Let’s take another look at where we started.
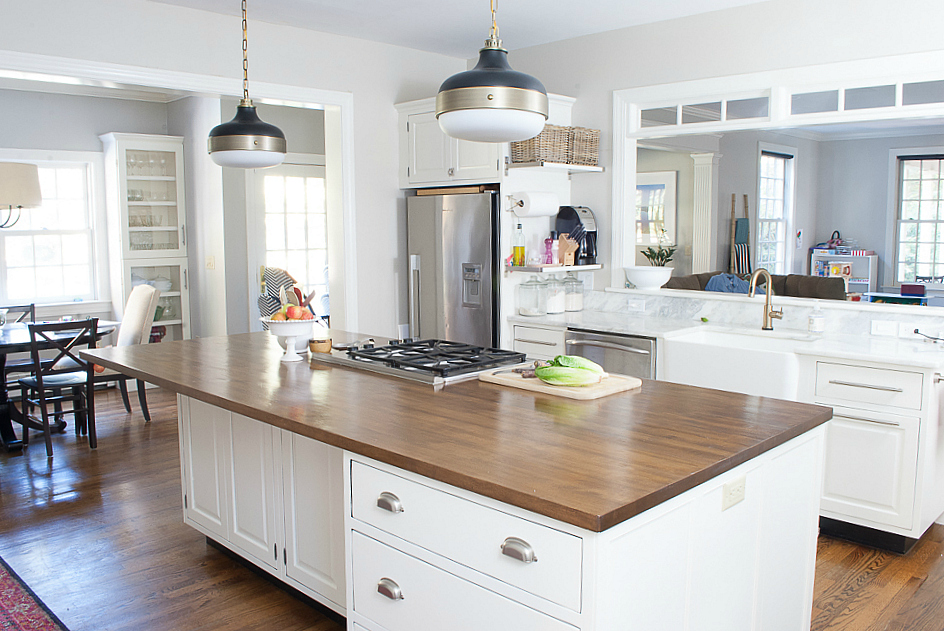
And now here’s a special fast forward to not only the refinished counters but including other facelift changes I’ve made to the kitchen over a year and a half.
What a difference, right?!
To maintain the counters I will probably give them a light sanding and a top coat of Waterlox every year or two. After living with them for two years now, there is a lot to like about this kind of counter. We’re in the process of replacing the cooktop with a full range and being able to just cut the counter out with a regular saw was a great perk. Plus any damage to the counters can be sanded out and refinished, which is not the case with stone counters. I absolutely love the warmth the wood adds to a white kitchen too.
So would you consider wood counters in your kitchen? I’m not sure I would have, if I hadn’t inherited these with the house. But I’m so glad now that I did.


Hi Jennifer,
How are the counter tops holding up? We’re preparing to install some and I love the color of yours!
Would you recommend staining/sealing prior to installing?
Thanks!
Sorry for my very slow reply! The counters have held up pretty well – the stain and sealing has been great. There are some indentations from my daughters drawing and such but they don’t bother me. I would stain and seal before installing only because of the smell of the products – it would have been nice to do in the garage or somewhere not in the house!
Hi Jennifer, Should you treat both top and bottom surfaces of the counter top or just the top surface that is used?
Just top and sides are necessary!
I have done steps 1-5 &I’m ready to sand & put the last seal on. The last time I put the Waterloo on it was only shiny while it was still wet
Hmmm, I wonder why. Mine has a definite shine to it once dry.
Waterlox has a satin finish product and the original product definitely has a sheen which lessens after a few months. That might explain it. Most of the pictures I see of post-Waterlock show a gloss to the surface.
I am a custom furniture maker and I also make high-end butcher block counters. Those darker counter tops that you admire are made with darker woods, not light woods that have been stained. Your method is absolutely NOT food-safe, especially with the products you’ve endorsed. Not only are you are allowing toxins to contaminate your own families food, but you’re out there jeopardizing the safety of your readers. You cannot use traditional stains on a wood surface where food in prepared! Period! Period! Period! And if you are resealing an old counter, you need to start with a Butcher Block Oil and then finish it with Bees Wax or Mineral Oil that’s food safe. I sincerely hope your grandchildren don’t have 6 fingers. And more so, I hope you will do the responsible thing and take this page down for the safety of others.
glad I read your comment before starting – is there any product you recommend that would be non-toxic/food safe? Or should I just sand and then reseal with the same mineral oil I have been using for 5 years?
I don’ want to hijack this blog. But if Jen will allow me this last comment, I’ll share how I do it:
First, if you want the dark wood look, you have to go for dark woods. Black walnut makes beautiful counter/butcher tops. If that’s not dark enough, go for wenge. My favorite is walnut end grain. Any end grain is darker than the long surfaces on wood, simply because it is more porous. The draw back to end grain is the amount of labor it takes do construct a large flat surface out of a thousand little blocks. but there are tricks. There are plenty of how-tos posted in various forums.
As far as sealing and finishing the surface, there are special oils for counter tops and butcher blocks. My favorite is John Boos’ Mystery Butcher Block Oil. I sand the surface down to 220 grit, then apply a coat of oil. I let that sit for a day, then apply another coat. I leave that dry for a couple days, then sand again with 220 grit. If you want the professional hand-rubbed satin surface, apply a coat of beeswax. I like Clark’s Cutting Board Finish. I leave this set for a couple hours then I buff it down. After three more days of curing, the project is done. Then I get out the veggies and chop chop chop.
Dan – I won’t chop anything on my butcher block island. I will just use it like any other countertop. In that case do I care whether or not it is stained?
Hi Dan
We just had our maple butcher block installed but I am disappointed with the color. It is far too light. is there any way you can use an oil to slightly darken it without any of the toxic chemical stains?
Dan,
I recently finished my butcher block counter with Watco oil and finish, I did 3 coats as directed on the can. My result is less than desirable. A sticky film is left and it is not durable at all. Impressions of my cups, dishes ect are left behind. Any advice?
if I may interject,,,Is that the danish oil finish? read the ingredients. I would never use that stuff. has chemicals in it. Strip it using mineral spirits. let it all evaporate. give a fine sanding. If you want to use a natural oil, use a mineral oil, beeswax or a natural tung oil. anything that says “finish” to it has other chemicals in it. Make sure whatever you use is 100% natural.
Dan, thank you for sharing this information. I respect your expertise in this area, however I did much research before I stained and then sealed my counters. The stain is underneath many coatings of Waterlox, which is widely used as a kitchen countertop sealer and is non-toxic once dry. I appreciate you adding to the conversation here.
This is not true. See my comment above.
Hi Dan,
Your a pro, no question. However, you’re creating a non-issue, pertaining to the logical use and reason for this article.
Jen, for an amateur, you nailed this project. Nicely done.
I’m assuming you weren’t refinishing your countertop for use as a true “butcher block.” Not only will cutting on a beautiful wood surface scratch it, but you could end up with modified polyurethane resin bits in your food (Dan, not harmful, by the way once cured…I still wouldn’t want to ingest it). What probably got Dan’s dander up was the process. Waterlox uses Stoddard Solvent. I’m no chemist, but I can tell you in confined spaces, with repetitive, prolonged exposure (we’re talking years), one may exhibit signs of nervous system damage, and or toxic reaction, up to and possibly including …. oh, boy here it comes… death. Add that to the list of toxins, naturally occurring and man-made, that we breathe in and subject ourselves to on a daily basis.
Dan – chill out. Jen did a fantastic job, and she gets joy out of sharing her accomplishments with others. You’re advice on ventilation in the room is spot on, Jen, as solvent does stink. That smell is the vehicle (solvent)evaporating or “flashing off” leaving behind your modified polyurethane resin (solids). If I could direct you to a fantastic alternative product, Chemcraft Aqualux Uniclear has virtually no smell (faintly reminiscent of latex paint), as it is a water based topcoat/sealer. It will leave behind a similar polyurethane resin solid (chemical speak for “topcoat”) once the water flashes off. That’s right, it uses water instead of solvent, and is much safer in that regard. However you choose to finish, be it with oil or solvent – always open a window and ventilate the room. Definitely don’t spray it without a booth/advanced ventilation. The fact that you went the extra mile and got a dust extractor…you did it as right as a homeowner could have.
Dan, I’m sure you’re a fine woodworker. No harm intended your direction. But seriously, have a beer.
You are funny :) Thank you for these tips – I’m going to do a light sand and topcoat to keep the counters looking fresh this spring when the weather is warn enough to have the windows open and will definitely look into the Chemcraft product. Thanks so much for sharing!
Hello OCG,
Thinking about using the Chemicraft product you referred to in the above thread for use after conditioning, sanding, staining and re sanding my butcher block. A couple of questions if you don’t object.
-As the product is water based, I’m assuming a water based stain would be best used?
-I have heard that water based stains can be of more likley to leach into food-is this still a concern using this product?
-Must this product be applied with a sprayer or can it be applied with a brush?
-How many coats do you recommend using on a BB countertop? I looked up the specs on the website and it looks like the time from application to sand is only one hour assuming appropriate application.
Thank you in advance for your advice!
FG
I thought Dan’s comments were useful and I didn’t seem him as being overly critical or anything. And Jen’s project turned out great. Kumbaya.
Thanks for such a great blog post, it really was a great deal of help to my husband and me when we stained and finished with waterlox. My husband is concerned that when we start cooking splatters of anything we cook, oils, greases will end up on counter. We noticed you have a stove top on your/next to your butcher blocks, how do you keep a handle on the cooking splatters? What do you use to wipe down after you cook? Thank you again!
I don’t worry too much about splatters and haven’t had issues with it damaging the counters (it’s been about two years since I finished them). I wipe down with an all purpose cleaner from Method each night. My butcher block is showing some wear and tear but more from my daughters’ coloring than from cooking! I may do a light sand and new couple top coats of Waterlox this spring/summer. But overall, I haven’t noticed issues from cooking adjacent to the butcher block.
Hi there, do you know what type of wood your butcher block is? We bought a birch butcher block counter from Lowe’s and applied a light walnut stain toa test piece (no wood conditioner) and it’s blotchy and extremely ugly. That’s what lead us here.
I don’t know what type of wood but that same thing happened to me when I applied the stain without a wood conditioner first. I sanded the whole thing down and started again from the beginning, but with wood conditioner the second time, and it helped a lot. The top coat of Waterlox softened any blotchiness too.
GOOD JOB, ALL THE STEPS ARE GONNA HELP WITH MY NEW BUTCHER BLOCK. VERY WELL DETAILED…… I DECIDED ON A GREY, WATER BASED STAIN AND WAS CONCERNED IT WOULDN’T BE ABLE TO BE SEALED PROPERLY. BUT NOW IM CONFIDENT I’LL HAVE NO PROBLEM
ip tv üyelik
ip tv üyelik
ip tv satış
ip tv satış