As far as I know, all of the bathrooms in our new house are original to the house, which was built in 1991. Most of them were done in pretty neutral colors, so while the tub and sink fixtures look dated, the tile is all in pretty good condition and we’re planning to live with the bathrooms as they are for at least a few years before making major updates.
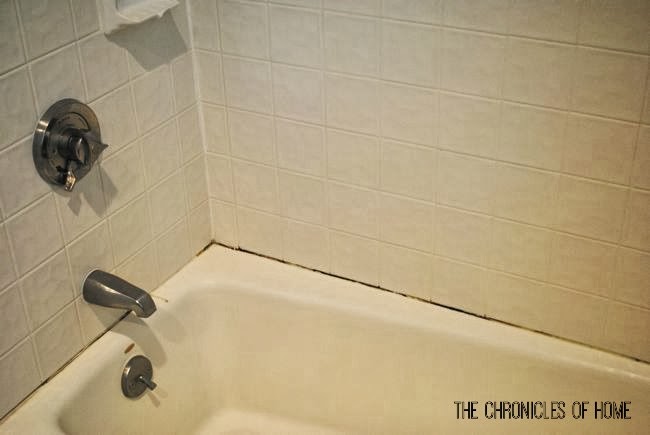
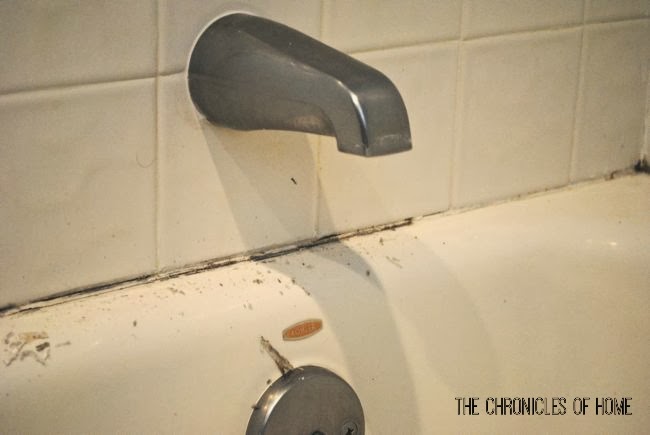
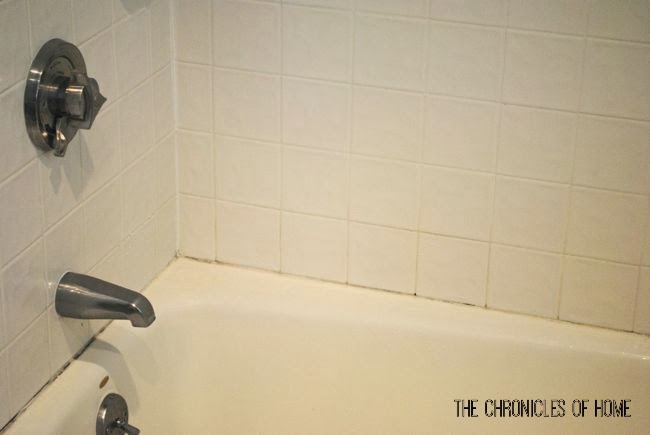
The guest bath has white tile on the shower walls and floor and the tile and grout are both in great shape. But when I first laid eyes on this bathroom I barely even noticed the tile because my eyes immediately went to the black along the edge between the shower walls and the bathtub.
It wasn’t until I looked at the rest of the bathroom a little more closely that I realized it was just the black nastiness that was giving the bathroom that old, dirty feel. And I knew I could take 20 years off the bathroom’s appearance just by re-caulking.
buywithoutprescriptiononlinerx.net/flomax.html
rxbuywithoutprescriptiononline.net/zocor.html
If you have a similar situation in your house, you can give your whole bathroom a facelift in just three easy steps:
- Scrape off the old caulk.
- Spray the seam between the tub and walls with a bleach and water solution.
- Apply new caulk to the seam.
And here’s a list of the simple materials you need to get the job done:
- Double-sided caulk tool (one side for scarping old caulk off and one side for smoothing new caulk)
- Bleach
- Spray bottle
- Silicone caulks (made especially for showers and tubs)
- Caulk gun
- Paper towels
I’ll break it down for you in a little more detail now so you can really see the process.
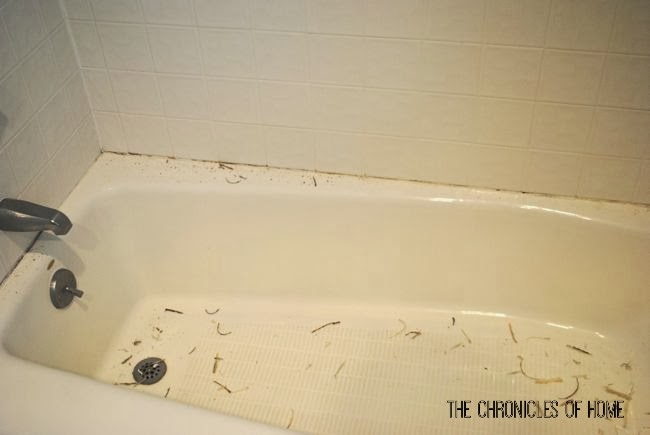
Use the sharp side of the double-headed caulk tool to scrape out the old, icky caulk. It can be stubborn in spots, but you just scrape away and pull the strings off with your hands (or needlenose pliers).
The tub will be filled with nasty old caulk – I just left it all there until I was finished, then swept and vacuumed it all up.
Still pretty brown, but better already!
Next I mixed up a 50-50 bleach and water solution in a spray bottle and sprayed the seam where the caulk was to kill any mold/mildew/general grossness. I let it sit for fifteen minutes, then rinsed with water and let it dry overnight to be sure the surface was completely dry.
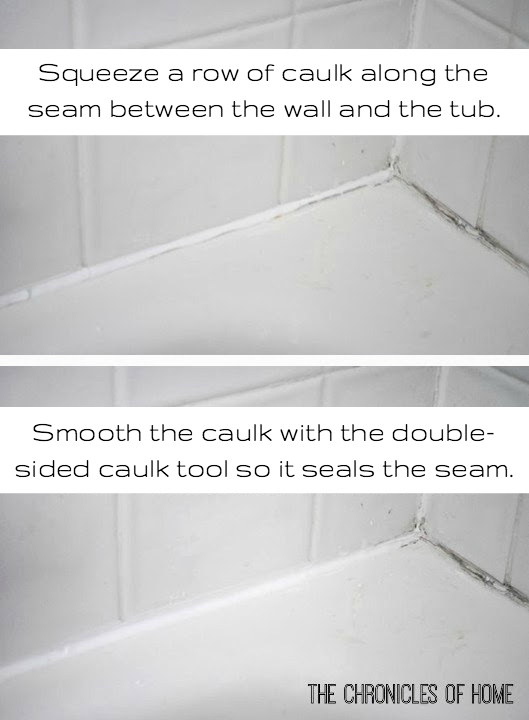
The next day I used a caulk gun to apply white caulk – make sure you get the silicone kind for showers! You squeeze a long bead of caulk along that edge between the shower walls and bathtub and then smooth it flat with the smooth end of the double-sided caulk tool. You can use your finger to smooth too but silicone is very sticky and I find the tool a lot easier to use. Have some paper towels nearby for wiping excess.
Make sure there are no gaps or all that yuckiness will start to build up again. You want the edge to be completely sealed.
I expected the tub to look better but even I was surprised at how MUCH better it looked.
I’d like to update the bath fixtures at some point, but this easy refresh made such a tremendous difference, I don’t feel the need to rush into any big changes anytime soon.
New houses bring all kinds of issues – we’re dealing with a majorly leaky roof right now – so it sure is nice when an update is as easy as a new bottle of caulk and thirty minutes!
ttp://rxbuywithoutprescriptiononline.com/fluoxetine.html
rxbuywithoutprescriptionrxonline.com
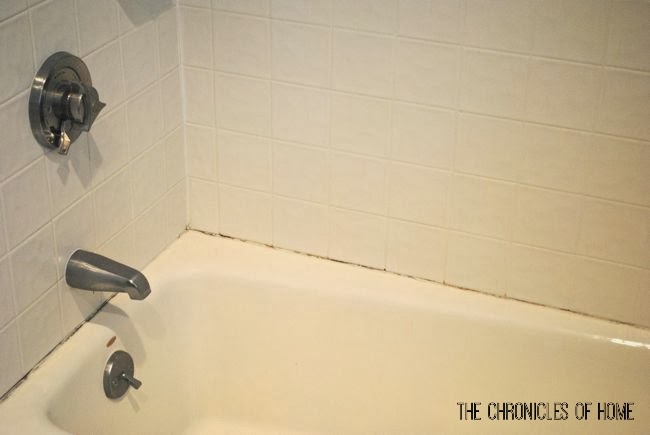
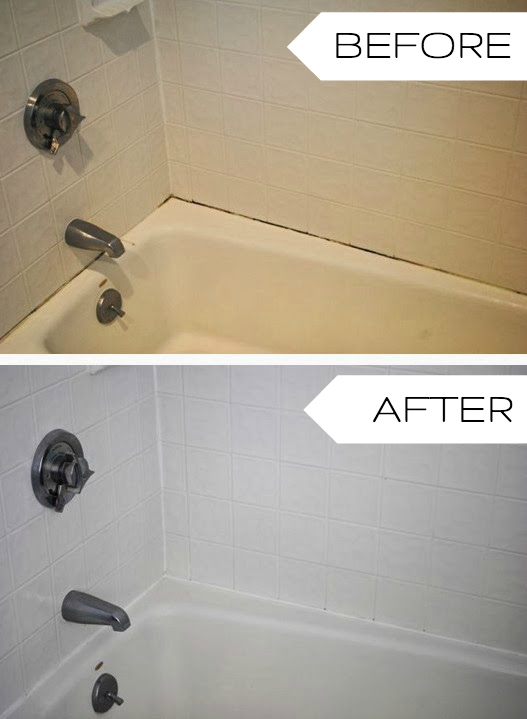


So much better and such an easy update!
My brother and sister-in-law showered in here before I did the sprucing and I was sort of embarrassed at how nasty it looked. It was a gross thirty minutes, but so worth it!
huge difference! we need to do this on our bathroom. and i like to make caulk jokes, so it’s always a good time when we pull out the caulk around here.
Oh, believe me, my husband will take ANY opportunity to throw down a caulk joke!
I swear caulk is like the best kept secret. Everytime I think about it I’m like eh… is it necessary? And then BAM everything looks new and fancy!
So true – makes things look practically brand new!
So much better! xo Kristin
Tell me about it :) I am no longer embarrassed!
It makes me wonder how the old owners lived like that .. ha! Looks SO much better, it’s amazing what you can do in 30 minutes!!
There were renters in the house for a year and I have totally wondered about their cleaning habits. From the looks of it, the bathrooms didn’t get a whole lot of scrubbing!
Looks great! We have grout that is a little gross like that in one of our showers, but unfortunately our shower needs to be totally regrouted, or retiled, to get rid of it. :/
Have you tried bleach or an Oxi-Clean solution? I’ve heard both work well on stained grout.
Looks great! Another trick for keeping the finger wiped caulk perfect and neat is to spray windex on your finger.
That is fantastic – never heard of this before! Thanks for sharing :)
I love these ideas but mine also needs a paint job,I guess, the colors are dull around the faucetsAny clues to painting a shower insert?
Hmmm – I have never done that. Is it tile or a solid surface? Have you tried cleaning with Bar Keepers Friend? That has worked wonders for me!
It is a solid surface.I am going to get and try Bar Keepers Friend,will give you an update,thanks.I tried the bleach and did not work at all,(smelled better,haha.).
I love these ideas but mine also needs a paint job,I guess, the colors are dull around the faucetsAny clues to painting a shower insert?
Disappointment in this article, Caulk isn’t going to make that change someone had to clean the tile and tub, that is what made the big different and no mention of how to do that. I just transformed our shower thinking it would need to be replaced, by using my Harbor freight 7″
Variable speed polisher and Zuds cleaner, I now can’t believe it is the same shower, than put a paste wax on to help keep it clean easier. Would like other ideas of how to clean a 23 year old stained tub or shower from the build up of hard water and body yuk and who knows what else.
Hi John – the color difference in the before and after photos comes from being shot at different times of day. Nothing was done to the tiles other than routine cleaning with a spray cleaner and sponge. The only change made was the process described here – removal of the old black caulk, thorough bleaching of the moldy area, and recaulking with bright white caulk. Because the caulk that was there was so black and disgusting, going through this process made the whole shower area look instantly fresher. Thank you for sharing your process for polishing dirty tiles – I’m sure that made a tremendous difference. I have never done a process like this so can’t give advice on it.
Toilet bowl cleaner REALLY does a job on grout & gunk. rinse well.
Great tip – thanks for sharing!