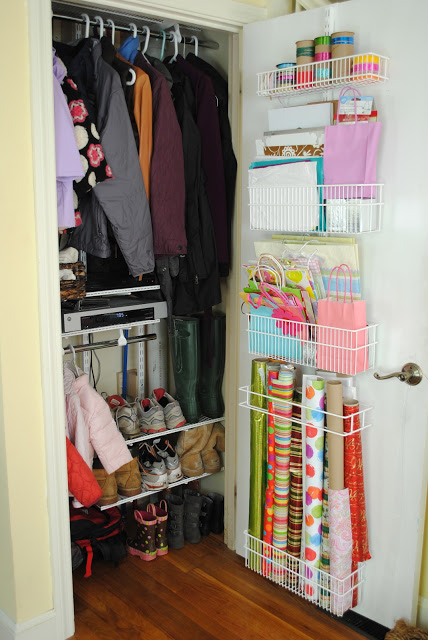
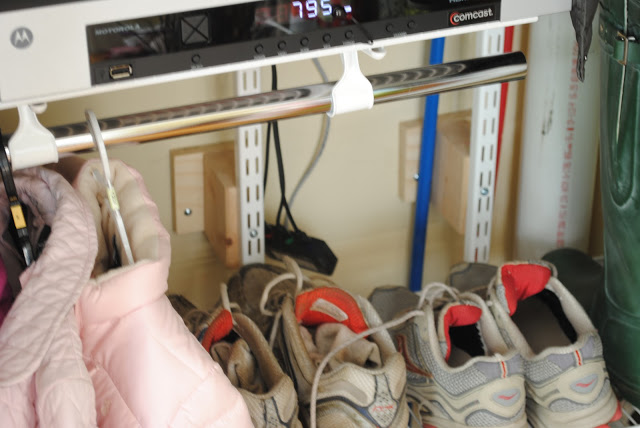
Today I’m giving you a peek inside our entryway coat closet, which up until a couple of months ago was a dis-as-ter. Coats were crammed in, shoes were piled on the floor, it drove me nuts every time I had to yank a coat out or paw through the pile of shoes. It’s a small closet but right inside the front door so we keep our most-used coats and our shoes-that-tend-to-get-muddy (work boots, sneakers, etc.) in here. There are also water lines running down the back of the closet that go to the “kids” bathroom we added upstairs right before Ada was born. And all of the components to our TV (cable box, Bluray), which connect remotely to our TV in the family room. So for a small closet, there is a lot going on.
Unfortunately, I have no before pictures since my dad helped me with this closet makeover a few months ago before I started blogging, but it is pretty easy to explain – there was a single shelf 3/4 of the way up and a straight rod across, directly underneath the shelf. That’s it. And I normally wouldn’t need help with something like this but there was some creativity and finesse involved working around all the water lines in the back. We had to build these little bump-outs out of 2x4s and plywood “plates” to make it work.
But thanks to my handy Dad and a weekend worth of brainstorming, two runs to The Container Store, and some old-fashioned manual labor, this coat closet functions beautifully and is super easy to maintain. My favorite mantra in action: everything has a place and everything is in its place. Still working on the rest of my house, but one step at a time…
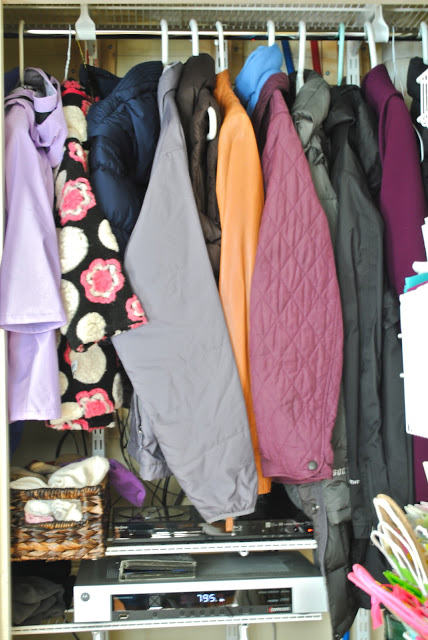
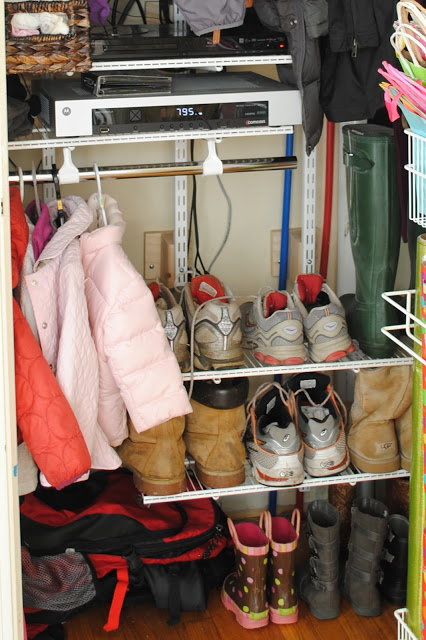
Some basic details – I used all Elfa components from The Container Store. There is a top shelf as high up as I could get it, purely to hang the top rod from. I wanted to maximize vertical space, which is why I positioned this so high. Medium-length coats hang to the left and longer ones to the right, where there is some open space below. There are two shelves roughly in the middle, to the left, that hold our cable box, Bluray, a basket with hats and mittens, and a (folded) pile of winter scarves.
Below the bottom shelf is another hanging rod with most of the girls’ coats. To the right at the bottom are two more shelves for shoes and boots, and I was sure to leave enough space underneath for some of the girls’ boots.
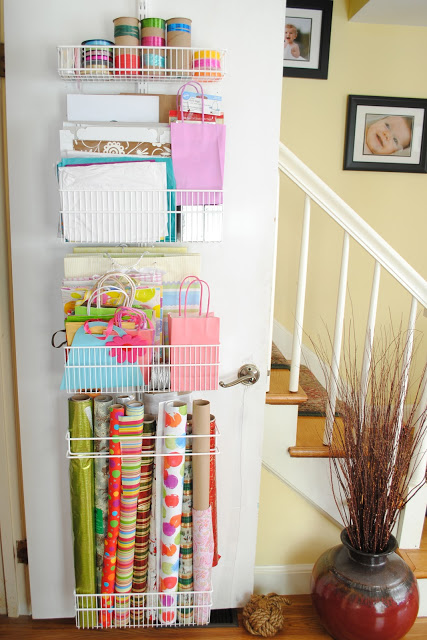
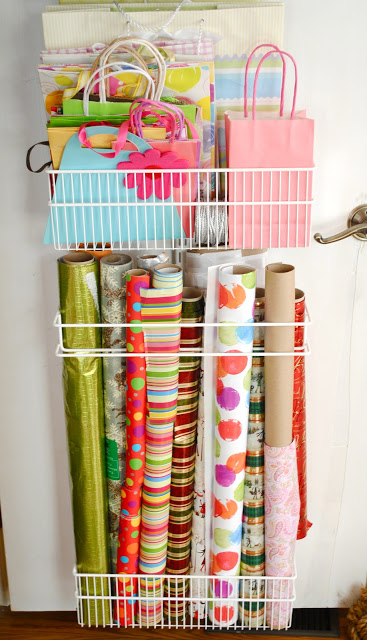
And the door component…how brilliant is it to use this dead space for storage and organization?! Of course! And I can unabashedly call it brilliant without a shred of hubris because I hacked it verbatim from this feature on IHeartOrganizing. My wrapping paper “organization” before consisted of a cabinet with everything shoved inside. It was a full-on avalanche every time I opened it up and was impossible to find anything when the time came to wrap a gift. Now everything – wrapping paper, gift bags, ribbon, tags, all of it – is organized, easy to see, and on the first floor of the house, where I keep the tape and scissors. For exact Elfa components, click the link to IHeartOrganizing above.
My first step in organizing everything was to pull every gift wrap item out and lay it all on the floor. I went through every item and tossed (or recycled!) anything I didn’t reasonably think I’d use. Part of what I love about this system is that it requires me to be thoughtful about what I keep.
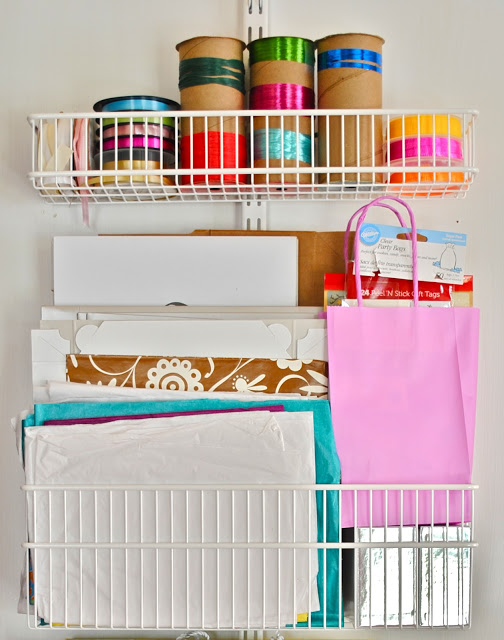
Up top are spools of ribbon and below that folded pieces of wrapping and tissue paper and gift boxes. I also corralled all gift tags and stickers in the little purple gift bag and placed it on top of some small gift boxes that couldn’t be broken down and flattened.
I certainly don’t mind wielding a drill but this installation barely required tools (just a screwdriver). It almost could not have been easier or quicker to install. And I gained so much storage in a previously un-utilized space. Doesn’t it kind of make you want to put one on the back of every closet door?? I am fighting the urge to hang one on every closet in the house. Imagine the possibilities! I have a feeling our pantry will be sporting one before long…

We have two hall closets that I desperately need to tackle but have no idea where to start. This gives me some ideas! Love the wrapping paper organization.
Looks great Jennifer. You got a lot of different uses out of this closet by organizing it so well. I really like the wrapping paper hanging organizer.
I have the same organizer to do this project. I loved it when I saw it. Yours looks great.
Jennifer, you are a girl after my own heart with a wrapping station like that. NO matter what i do, I seem to out grow what I do. Wonderful idea. Thanks for popping in and linking up to the C.A.L.M. party!
great tips! I always need help organizing wrapping stuff!!
Aleah Helton
House of Helton
http://www.aleahhelton.blogspot.com
It just has a way of getting out of control if you don’t really make a plan, right?
Wow. With the avalanche of birthdays-baptisms-parties-holidays-babies, etc…Gift wrap is crucial, right?
I love using doors. Without using them, I’d be at a loss! We have nine closets in our 1200 sq foot home…but they are all dated like you mentioned in your before… After 8 years of living here, I think my DH finally gets the new to bring them into this century…
Do you also have a gift closet somewhere? I usually stock mine for kids’ parties throughout the year, as we go to roughly 30 a year!
Thanks for sharing…I’m pinning you to my organized board!
Okay, this is such a great way to store wrapping supplies! And you can see what you have so easily!
where did you purchase the wrapping paper organizer ?
They’re various components from The Container Store. Links in the post, I believe.